
I know there are quite a few tutorials out there on how to make this, but there's no harm in sharing the joy again right? These photos aren't very pretty, but they show you just how easy it is for us to make things out of recycled and pre-loved items.
Okay so first you need to gather your materials:
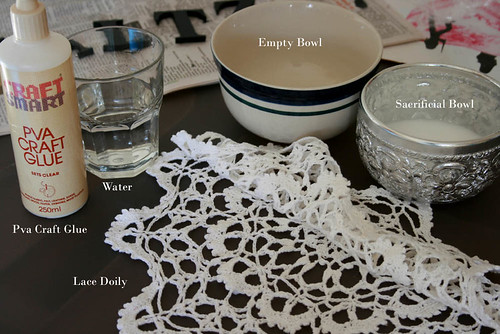
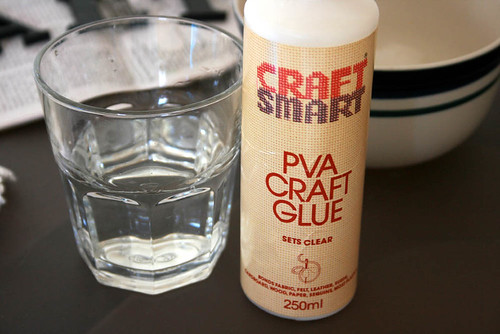
1x PVA Craft Glue
1x cup of water
1x Lace Doily (50 cents from my local op shop!)
1x Empty Bowl (make sure that this is the size you want your lace doily bowl to become later on!)
1x Sacrificial Bowl (you'll see why later)
1x Mixing tool ( I used an ice cream stick)
1x roll of Clingwrap (you don't need very much!)
To begin with you take the PVA craft glue and your cup of water and mix equal amounts of it into the Sacrifical Bowl. Mix it well with your mixing tool!

You should get this watery white substance like the picture above. Doesn't it look like coconut milk? It is not edible, don't even try. This is also why I say use a sacrifical bowl. I don't think I want to be eating out of this bowl ever again! You can of course use other things such as a bucket, or an empty can. There's no limits here!
Take your doily and soak it in the white substance thoroughly. Make sure every bit of the doily is soaking wet!
You can even leave it in there for a small soak.
And while the doily is taking its soak, you can quickly clingwrap your bowl.

The reason you do this is to prevent the doily from sticking to your bowl and you potentially ruining the shape of the lace bowl when you are trying to pry it off the bowl. So don't skip this step!
Take your soaking doily out and squeeze the excess out. Make sure it's not dripping anymore, or else you will get sticky water dripping all over the place. Not fun.
Once you are done squeezing it out, drap it over the bowl you just cling wrapped and pop the bowl onto something else to keep it elevated. I just used another glass.
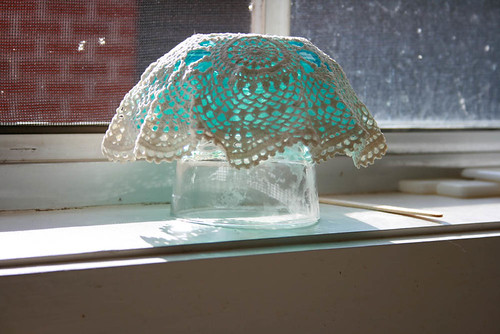
Take this time to shape the bowl however you'd like. I made tiny pinches all along the sides to give it a slightly wonky shape. I wanted the bowl to look weird and wonky! It's part of the charm, really.
Leave it to dry, preferably somewhere that has the potential for direct sunlight. My kitchen window sill is perfect for this so I sat it there for about 48 hours.

Once you are sure that it's completely dry, it should harden up significantly. Take it off the ledge and proceed to remove the lace doily from the bowl. Be very gentle!! If you find it hard to pry the bowl out, try unwrapping the clingwrap and sliding the bowl out from the clingwrap. You should find that this makes it much easier and the bowl will dislodge itself from the doily quite willingly.
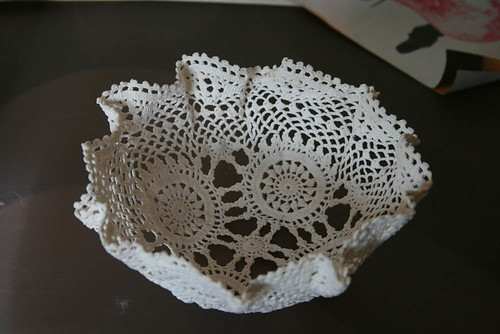
And voila! Your very own lace bowl. Easy isn't it? If you do try your own, please link back and show me your bowls!
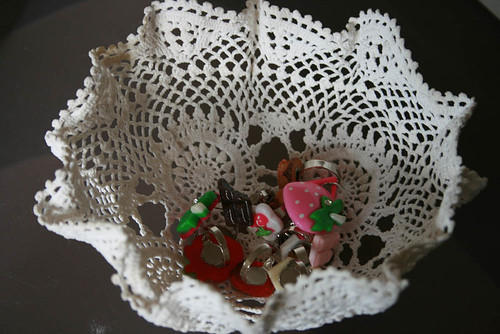
Can you spy the chocolate? Mine's going to be filled with yummy rings and such at the market, so children can have a go at digging for their favourite sweets that won't rot any teeth!
Hope you found this tutorial fun and easy to read. Till the next one!
Notes:
1. There are other ways to starch lace such as using corn starch, sugarxwater or commercial fabric stiffener. However commercial fabric stiffener is permanent and won't wash out while the rest can be washed out if you dislike the shape of your bowl! Sugarxwater will melt in heat, so not suitable for outdoor markets or any place that's hot. Corn starch is definitely a good way to go.
2. You can also dye your bowls, just dye the doily before you starch it, or add the colouring into the starch.
3. If you think your bowl is still too soft after it dries, you can spray it with a bit of corn starch to help stiffen it up.
.JPG)


Oh cute idea! Love it :)
ReplyDeleteI love that!So cute!
ReplyDeleteIt's turned out really well Celeste! I think you're going to do well at the market!
ReplyDeleteThis is such a cute idea! I think it will compliment your jewelery perfectly at the markets :) Thanks for making this tutorial!
ReplyDeleteLooks great! I love a tutorial!
ReplyDeleteooh thanks for the tutorial!
ReplyDeleteJust perfect timing for me. I bought some vintage doilies recently that didn’t end up suiting the purpose they were purchased for but they will make the cutest little lace bowls. They must have been just waiting for me to meet you in blog land!
ReplyDelete