Sunday, November 29, 2009

Waltzing through with Talent: Ky and Cloud from Voodoo Rabbit

Wow, it's 30th of the month and we are looking at yet another Waltzing through with Talent segment. Did you enjoy last week's? I promise you I have many more exciting ones lined up for you with fantastic giveaways!


I met today's stars when they joined the Australian Dust Team. Or technically, I got to know Cloud. Ky was very much just a name that floated around but I got to meet both of the ladies in person recently when they came down to Melbourne for a quick visit. And let me assure you that these two Brisbane ladies are just fantastic! Absolutely great personalities, and I'm not even being bias because they are fellow EGL and EGA lovers! So sit back and get to know these two colourful personalities, and as a treat, we got both of them to answer the questions, not just one!


Who are you and what do you sell?

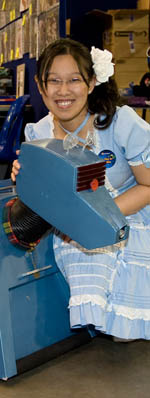
We’re Ky & Cloud & our shop is called Voodoo Rabbit. We specialise in fabric & sewing supplies for the “dark arts & craftist”. We are sisters (in law in avery complicated fashion) but most importantly we are friends / craft buddies.

What are your inspirations and muses?

Ky: My partner Matt, he always encourages me in all of my projects and has been really supportive of Voodoo Rabbit. He has been encouraging me to do my own designs for years and now I am finally doing it. I also find Alexander Henry fabrics very inspiring and one day hope to create fabics as beautiful as these.

Cloud: Ky inspires me to stick with stuff and try new crafts. I bought my first sewing machine because of Ky and it has let me to start up Voodoo Rabbit with her too - I need to buy wholesale to maintain my steadily growing hoard of fabric (it’s like dragon gold to me).

How does your creative space look like?

Cloud: My creative space looks EXACTLY like Ky’s study.

Ky: My creative space would look a lot bigger without Cloud taking up all the room! Actually it’s on the top floor of my house, directly under the roof (so it’s stinking hot in summer & freezing in winter). I’ve got my sewing machine, overlocker & cover stitch machine on one side of the room. On the other, I have my computer, scanner & wacom tablet (for when I’m designing fabrics) and my huge blanket box full of fabrics that Cloud can’t have. Also it is usually a mess and I can never find anything.


Tell us a little about what makes you, you. Your other hobbies, day job (if any!) .. anything that makes you tick!

Ky: I’m a graphic artist, work for a computer games company and I’m also a bit goth. I sew – clothes, appliqué, quilts, etc. I also cross-stitch, sashiko and I recently finished my first trapunto. I’ve started drafting patterns (the latest one from a Gosu Rori magazine I bought in Japan) and I’m really working hard to take my sewing to a higher level. I haven’t had much time for other hobbies lately – I recently finished helping my youngest sister prepare her wedding – all of the stationery, hens’ night t-shirts, a cross-stitch for the cover of the guest book, faux fur shawls, jewellery and the brides’ veil. I’m really proud of the veil.

Cloud: I have no creative skills – just crazy ideas! I make the occasional softie but mainly I start projects and never get around to finishing them. I have a mermaid cross-stitch that I started over 3 years ago… I haven’t done any work on it in over 2 years. I also have a trapunto block I bought & started at the same time as Ky. Hers is finished & mine is lost somewhere down the back of the couch barely started! I do accounts / book-keeping for my day-job, so I do the bookwork & the bossing around for Voodoo Rabbit too. I seem to be a compulsive twitter freak – I managed an average of 90 tweets per day on my first 3 days!

What are you most proud of in your crafting/art life and your personal best achievement?

Ky: Definitely everything for my youngest sister’s wedding. The veil is top of the list, it took hours to do all of the beading on it. I'm planning to write a blog post about it as part of a series on all the crafting done for the wedding on Not Dark Enough. I'm also really proud of getting my first fabric designs printed at Spoonflower (our Gingham Invaded range).

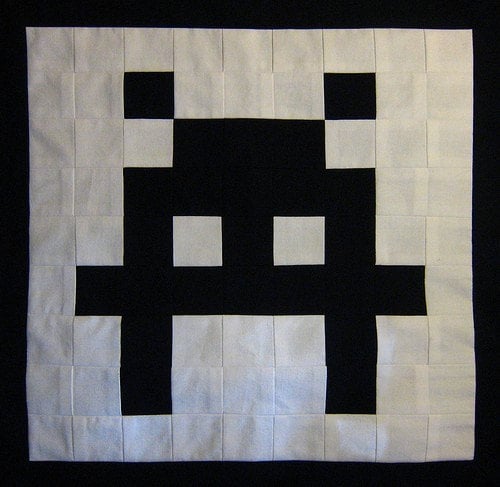
Cloud: I think the space invader patchwork cushions that Ky & I just designed & made. It has been so long since I actually finished something creative. They looked really good. For some reason I can’t hem a skirt but I can patchwork like a demon!


Complete these sentences:

Ky:


* I love...chocolate, I can't eat too much of it these days without feeling sick but I always come back for more.
* I cannot live without... Matt who keeps me sane and focused. Also my sewing machine, I think it needs repairs but I don't know when I will be able to take it in - it is a good thing I don't sew stretch fabric too often.
* I hope... to quit my day job and open up a fabric shop with Cloud. There will be a small cafe in it where you can sit and have a cuppa and a biscuit while you mull over your purchases.
* When I grow up... I will no longer make computer games for a living, I will sew and craft to my hearts content. I will sell awesome fabrics to like minded souls and go on fabric buying trips around the world.

Cloud:

* I love… my partner Sam-Sam, my kitten Pikel (he’s my fuzzy little man) & Japan
* I cannot live without… my i-Phone. You’ll need to prise it out of my cold dead hands before I’d ever give it up. Oh, and my partner Sam-Sam & my kitten Pikel (just in case they’re reading this :p)
* I hope… to open up a ‘real’ fabric shop with Ky. It will have a coffee shop attached and will be next door to a rockin’ tattoo parlour.
* When I grow up… will be when hell freezes over! I love being a big kid – no growing up for me. Unless growing up gets me what Kyle wants too :P

What do you like best about the crafting/art world.

Ky: I like that there are people out there who can make such awesome things all by themselves and not have to rely upon mass produced products. I just wish that it wasn't getting so difficult to source supplies.

Cloud: I love being able to produce something myself. I can’t stand mass-produced waste & consumerism. The planet can’t sustain it and it’s all crap anyway. I’d much rather spend money either making something for myself or my friends, or buying from another crafter. I guess it’s a bit ironic saying that, considering I’m now supplying commercially produced crafting supplies. I like to think that Voodoo Rabbit isn’t supplying ‘mass-produced crap’ or ‘leeching’ off crafters. Ky & I craft ourselves and want to provide the stock that we just can’t get in the stores. We’re also extremely dedicated to producing our own fabric designs – not just supplying the stuff that’s already out there.

Where can we get more goodies from you?

At the moment we’re only listing on etsy but if you email us (sales@voodoorabbit.com.au) because you see something you want on our etsy site, we’ll sell it to you. We’re also planning on starting up a stall at the Southbank Markets and maybe a couple of other places around Brisbane.


Let me just say this: You Brisbanites are very lucky to have them living amongst you, for I'd KILL to have them in my backyard.

But for today we are sharing the love worldwide. The ladies have been very generously and have offered to give one very lucky Little Waltz's reader their very own Patchworked Pixelated Space Invader Cushion Cover worth 45.00 usd and lovingly handmade by the both of them.


I am so incredibly sad that I can't enter my own giveaway. I want this for myself!!


As usual, the following rules apply: (Please read for it may be different from previous week's!)

· One entry for each of our blogs (Not Dark Enough, Voodoo Rabbit & Zombie Hare) that you follow. Please leave a comment saying you have done so!

. One entry for following this blog Little Waltz

· One entry for following Voodoo Rabbit on Twitter @vooodoorabbit & then tweeting about the giveaway

Please tweet the following statement: Fantastic Space Invader Cushion Cover by Voodoo Rabbit to giveaway, come check it out here! http://tiny.cc/CjabM

· One entry for becoming fan on our Facebook Page.

· Two entries for each purchase (from: our etsy store) made during the period of the giveaway.

This giveaway will end 14th December 2009, 10am Melbourne time. The winner will be announced on the following Waltzing through with Talentpost.

So why wait? Get cracking and you could be that lucky winner!


Would you like to be considered for this feature? Send me an email at petite.valse (at)gmail.com and tell me why you'd like to be in the feature!


The winner from the last Waltzing through with talent is:
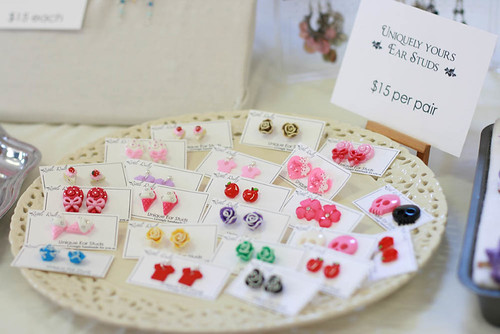


Pippirose!!

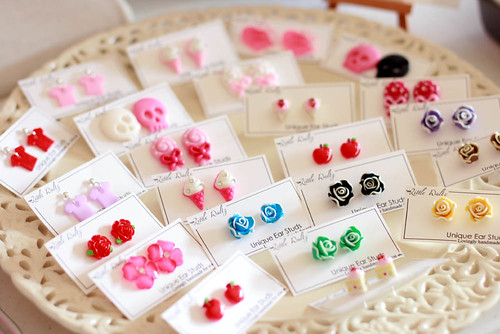
Congrats! Please send me an email with your address and we'll send you your earrings asap!


Share/Save/Bookmark

Friday, November 20, 2009

DIY Tutorial: earring displays

Earrings are such whimsical things. They can sit and twinkle from your ear lobe or they can dangle and catch the light and shimmer everytime you turn your head.
I love earrings.

In fact, they were the first piece of jewellery that I covet, and till now earrings hold something special in my heart.

But I always have an issue. How do you keep them so that they don't get tangled? Especially if you are like me and especially love the crazy long ones that dangle past your shoulders. They get tangled so so much!

So here's a tutorial on how to make a display for your earrings: it doesn't just keep your earrings tangle free, they also allow you to show them off like the pieces of art they truly are!


You will need:


1x thumbtack
Jewellery pliers


1x cardboard with windows cut out
(Make sure that the windows are longer than your dangle earrings!)

Not pictured:

1x silver chain (or any colour chain you'd like really)
Jumprings.

~~~~~~~~~~~~~~~~~~~~~~~~~~~~~

Step 1:
Cut out windows from your cardboard as shown above.
Make sure that your cardboad is fairly thick!
If it's soft, it won't hold the weight of the earrings.

Step 2:


Measure out the length of chain you need.
If you want your chain to be tight, you need to cut it slightly shorter than the width of the window.

Step 3:

Use a thumbtack to punch holes in the side of the cardboad.
Try to punch the holes near the side of the window.

Step 4:

Attach the chain to the cardboad by hooking it up to the holes with jumprings!
See why you need to punch right at the side now?

Step 5:

Repeat steps 2 - 4 for the rest of the windows
And you are done! Technically.

Step 6:
This step is optional. But we are crafty people, so...

~* it's time to decorate! *~


This is what I did with mine. I wanted something simple and girly!
Plus, I do have a heap of flowers and ribbons laying around..

And there you have it!


Your very own earring display, customized the way you want it to be,
a work of art that's functional to boot!

How was that? Easy isn't it?
It takes about 10 minutes to do, and it's so much fun!

Perfect for the bedroom, the craft room, even the living room!
Plus you can change the earrings around, so you can constantly update the piece of art.
Or even put one next to the front door, so you can grab a pair just as you go out.

The possibilities are endless...

So try it out, and please do show me your results~~!
Good luck! and Happy crafting!


p/s: You can make it as large as you like, with as many windows as you like. It's really up to you!


Share/Save/Bookmark

Tuesday, November 17, 2009

Shamless plug: Sometimes we all need a bit of a kick.

It's been awhile since I spoke about my shop and my items, so here's a quick run through of what's been appearing on the craft table so far:


Yellow Roses Ear Studs: You can find them here


Light pink ice cream Ear Studs: You can find them here


Mezzo Piano Musical Ear Studs: You can find them here


An apple a day Ear studs: You can find them here


Black x Pink Skull ear studs: You can find them here

There are more but I haven't been able to upload all of them yet.
So stay tune to my MadeIt store and my Etsy store!


Share/Save/Bookmark

What do you sell?

What do you sell?


Here's a question often found on application forms for craft markets, a question often asked between business associates.. and while I always have to give them the boring version, here's what I'd love to answer:


I sell dreams of elegance and delicacy, of hope and desire for the pretty. I sell sparkling gems and jewels that feed the womanly soul and allow it to soar in the skies of the world. I sell hope, happiness, tears of joy and tenderness. I sell sweets and candies that will sweeten your dreams and make your smile in your sleep.

I sell sparkles and twinkles in your eyes, shining and shimmering like a star in the night. I sell beautiful flowers, hoping that your spirits be lifted and rejuvenated with its gentle dance in the wind. I sell songs and sounds to adorn your ears, and tender kisses upon your hair.

I sell stories, fairytales and dreams that will nestle upon your chest like a baby cuddling up to the warmth. I sell crystals and diamonds, catching them as they fall from the sky.

I sell jewellery, lovingly handmade every bit and every piece.. but are they truly what they seem to be, or perhaps they mean much more?


So here's my question to you:

What do you sell?


Share/Save/Bookmark

DIY Tutorial: How to make a ring display


You might remember this rather terrible photo.


And my promise for a tutorial on how to turn almost anything into a ring display.

Well, this is it.


~~~~~~~~~~~~~~ Tutorial Start! ~~~~~~~~~~~~~~


You will need:


1x item you'd like to make into a ring display.
(In this tutorial, it's a baking tray, but anything with a bit of depth will work)


1x foam fill
You can buy bags of 4 pieces at spotlight. It will contain 2x thick, 2x thin pieces.
The thick pieces are better, but the thin ones work too.


1x piece of white felt (or any colour you want your display to be)
1x scissors
1x craft knife
1x double sided tape


Step 1: Cut the foam to size.


Optional step: If your container is deep like my baking tray, don't waste the leftovers!
Use it to stuff the bottom so you don't have a hollow base.


Step 2: Check that it fits, trim the sides.
(Sorry I was doing this in the kitchen..please don't mind the messy kitchen table!)


Step 3: Line double sided tape all down the foam.


This is how it should look like after you are done. Remove the top layer of the tape.


Step 4: Stick the felt on the top. Careful to make sure it's flat and not wrinkly!
Because my baking tray was longer than my felt pieces, I had to cut small strips to cover the edges.
Aren't those lines ugly?


Step 5: Don't like the lines? Decorate it to make it pretty then!
Lines? What lines?
Tuck the foam base back into the tray.

(Sorry no photo for this!)
Step 6: Pick up that craft knife and start cutting slits through the felt and the top of the foam.
Make sure that the slits are wide enough to hold your rings.Usually 2-3 cm is fine.

And there you have it!
Your very own ring display!

Here's the one in the tutorial in action!


You can decorate it more if you like, however I wanted mine to be recognizable as a baking tray. Hehehe.

So how was that? Easy, isn't it? You can turn almost anything with a bit of depth into a ring display this way!
My cupcake stand was slightly harder as we had to make it round, and had to punch a hole through the middle for the handle.
But the technique was exactly the same. So take a look around you, what can you use to make into a ring display?


Share/Save/Bookmark

Sunday, November 15, 2009

Waltzing through with Talent - Kelly from Vitae Clothing and Accessories

Hasn't the fortnight just gone whizzing by? It's time for our next Waltzing through with Talent!


This time I'm featuring a dear friend of mine. We met due to our interests in lolita fashion , and while her being in Adelaide means a lack of hang out time, I still know for a fact how awesome she is, and you are in for a treat as she has the cutest giveaway lined up for you!


Who are you and what do you sell?
I am Kelly, and I run Vitae Clothing and Accessories. I sell Lolita Clothing and Jewelery, Gothic Clothing and Jewelery, and the occasional Cosplay or "normal" clothing too! Recently though, its been mainly Lolita stuff.

What are your inspirations and muses?
I love the Rococo era, its one of my biggest inspirations for designs in my dresses- that and fairytales and Fantasy. My favorite tale, and one I plan to create in Ballgown-form, is the Story of SapSorrow, with her dresses, "The Sun", "The Sky", and "The Stars".


How does your creative space look like?
... It's a little cramped. I don't have a lot of room here so there's two desks with two sewing machines and a computer all jammed in, with so many bits and bobs stacked all over it! There's also two filing cabinets stacked one on top of the other, a glory box and about three suitcases full of fabric. One day, when we are in a slightly larger place, things might be a bit roomier! Haha.

Tell us a little about what makes you, you.
Well, sewing is one of my favorite pastimes, and I do it even when I am meant to be having a day off haha! But I also love to dance, and do so as often as I can. I usually do contemporary or hip-hop. I'm also a total nerd, I love video games and play them fairly often! (sometimes when I should be doing homework!)
I also study Aged Care at TAFE, and hope to study Nursing at University next year.

What are you most proud of in your crafting/art life and your personal best achievement?
The continuing and growing success of my business, Vitae, is my crowning glory :D Attending AVCon as an artist this year and selling out was a great feeling, and things have only been getting better from there. Also attending fashion shows is a highlight for me- Its great for business and so much fun!


Complete these sentences:
I love:
Chocolate, Cream, and Sewing. Oh, and my partner Joel- I couldn't DO without him!
I cannot live without: Insulin! I'm a diabetic :)
I hope: A lot of things but most of all I work towards my dreams- there's no point hoping if you aren't trying too!
When I grow up : Haha. I want to Be Sailor Mars! I really did want that as a child you know. A Rock Star Sailor Mars. :D

What do you like best about the crafting/art world.
Making something from nothing. There's something special about taking the raw materials in your hands, and moulding them into the shape your minds eye sees. And when you're finished, sharing the things you've made with everyone out there.

Where can we get more goodies from you?
Well, aside from Etsy, I do direct sales and commissions through Livejournal at my sales journal there- and I hope to soon have my website vitaeclothing.net up and running! (But, I'm terrible at websites, so it has to wait!). And we also have a Facebook Page, so please do join that!


Isn't Kelly adorable? Here's what she has lined up for you!

Kelly makes the most adorable polymer clay cupcakes and such and today she's made us some for earrings!


So how do you win this?

Here's how to win:

For 1 entry: Follow Kelly's Blog either through your feed reader or via the Google Friends Application. Please leave a comment saying you have done so /are already following. This step is compulsory.

For 1 entry: Follow My Blog either through your feed reader or via the Google Friends Application. Please leave a comment saying you have done so /are already following.

For 5 entries: Purchase anything from Kelly's Shop - Aetas Vitae

For additional entries (worth 1 each), you can:

- Blog about this entry. Remember to leave a seperate comment with the linkback.
- Tweet about thhis entry. Remember to leave a seperate comment with your twitter name.
- Add Kelly's shop to your fave list

This giveaway will end 30th November 2009, 10am Melbourne time. The winner will be announced on the following Waltzing through with Talent post.

So why wait? Get cracking and you could be that lucky winner!


Would you like to be considered for this feature? Send me an email at petite.valse (at)gmail.com and tell me why you'd like to be in the feature!


We also have a winner from our previous giveaway from Sanchia from Little Red Wagon Kids!


Congratulations to Nandine from Please, please go to sleep!
Please get in touch with me with your contact details and we'll send you your prize asap!


Share/Save/Bookmark

Yarraville Market: A report

And with that, today's market is over!

I definitely enjoyed today's market, and I loved how intimate it felt. I was also really lucky as one of my friends came down to hang out with me behind the table and we even managed to sneak away for a milkshake and pie.

I met a few interesting ladies today and had a lovely chat with another stallholder who's an artist. Sarah from Billyboy and Mia came to visit me at my table as well, and it's always lovely when internet friends meet in real life! I love being able to put faces to names, it's rather like.... 'aha, you actually do exist! I'm not going crazy!'

I'd love to go back to Yarraville Markets if possible. I think the venue's just lovely!

Anyhow, here's some photos of my table today... There are still things I'm changing and things I meant to do but ran out of time to.. so the next version of my table should hopefully be much more attractive than this one!


My newest ring display, yes that's a baking tray! Also note the quirky stop sign rings. Hehehe.


It was tiring, but absolutely amazing. How about you? How did your Sunday go?


Share/Save/Bookmark

Saturday, November 14, 2009

My Creative Space + Market tomorrow!

Tomorrow is market day again, and I'm really looking forward to it now that it's the night before.

Have a look at the ear studs I've been working on:


They will be available online later on next week... well what doesn't disappear at the market anyhow. But I do hope many of them will go home with new owners tomorrow! I do so like seeing them go off to new homes..

More table shots after tomorrow, I've added a few more things. I'll also post up that ring display tutorial very soon, and there's a new Waltzing through with Talent to look forward to on Monday!

If you haven't joined our latest giveaway, there's still time to do so now!!

Remember, if you are in the area tomorrow, I'd love to see you! So hop on over!


Please do say hi if you come, and introduce yourself! I don't bite, I promise!


Share/Save/Bookmark

Thursday, November 12, 2009

Little Waltz - Craft stall setup

Northside was more than a month ago now and even as we speak, the next one is creeping up on us later this month.

I was originally going to go for the Daylesford Christmas Craft Market on that day, but accidentally forgot to send in my application form..... whoops.
It turned out that it was just as well since I need to attend a children's music concert the same day, so I wouldn't be able to do the duck in-duck out thing I'm planning to do on the 28th of November!

I did promise pictures of my craft stall from Northside Makers, so this will the post about it. Are you ready?

Let's start with my concept sketch. I really do fail at drawing, so please excuse the rather shoddy sketch.


At the side is an incomplete list of things I should be displaying on my table.

I loved the idea of bunting so was considering getting custom buntings made with my name on it.
The brown piece with red Vs on them were meant for necklaces, the blue cards on the laundry line for earrings and the suitcase (my vintage one!) would have been filled with prepackaged brooches. Namely my raincloud/lightning/sunny day brooches. And the orange bowls by it were meant to stand for the lace bowls I had made up for the table.

I then spoke to a friend of mine who is a brilliant engineer. He's rather handy with his hands and does rather amazing work. As a result of that, he made me the basic wooden stand for my table, with a few changes:


This was the beginning of the stand. It's semi-permanent, there are screws we tighten once it's on the table to make it permanent and not collapse randomly. We did have to change the idea of the laundry lines for earrings: The wooden frame by itself wasn't stable enough, so he had to add a mesh. Technically I could still have done the laundry line thing, but I wasn't fond of the idea of the mesh showing up behind the earrings.

Once the base of the stand had been made up, I hopped down to Bunnings and got myself a can of paint:


And started to paint it all white. Thankfully, the weather was fantastic during that week of September school holidays, so it all dried in record time. And while that was drying, I ran along and got myself some signage:


Scrapbooking letters that I painted black!


Unfortunately I don't seem to have other progress pictures. But other than painting the frame white, I also had to figure out a way to attach a corkboard to the MDF board for the necklace. I had a lot of issues trying to find a large enough corkboard that didn't already come with its own frame, so in the end I got a pack of cork floortiles from bunnings, some liquid nails and made that into a corkboard instead. This allowed me the flexibility of cutting it down to the size I wanted it to be exactly. Though now I have a whole tube of liquid nails that I'm not quite sure what to do with. Hm.

Alright then, so after all that work.... here's how the actual booth looked like on the day! Sorry about the blurry photos.. I didn't realise that I hadn't adjusted my camera settings properly.. I think I was too distracted with other things!

I shared my table with the beautiful Kerri from Vintagesewandso, but what I'd like to show you is my side of the table.


The full view


A close up of some of the necklaces and the hairpins


Close up of the ring stand


I am quite proud of the setup, especially of the fact that most of it, had been handmade and/or thrifted. The ring stand was originally a cupcake stand that I thrifted for 10 dollars. I then obtained some foam, felt and double sided tape and made it into a ring stand. I will be doing a tutorial on that soon, so stay tune on how to make your very own ring display!

The trays and plate that the hairclips are displayed on were also thrifted and rather beautiful in their own right.

I'm not quite sure if you can see much of the earring display, but basically they are cute little heads that yet another talented friend drew for me. I enlarged them and printed them out and used them as the base for earring display: much more interesting than your normal earring stands!

The tablecloth was also thrifted .. it was originally a bedsheet! I cut it down to size, and used the remaining piece to wrap the corkboard with. Perfect fit.

So what do you think? Yay or Nay? There are many things yet that I'd still like to improve, so stay tune for my next craft table setup!


Share/Save/Bookmark
Blog Widget by LinkWithin